Quick Verify
Below are the steps to quickly verify the basic MQTT functionality of BifroMQ using MQTTX.
- Visit https://mqttx.app/ to download MQTTX and install it.
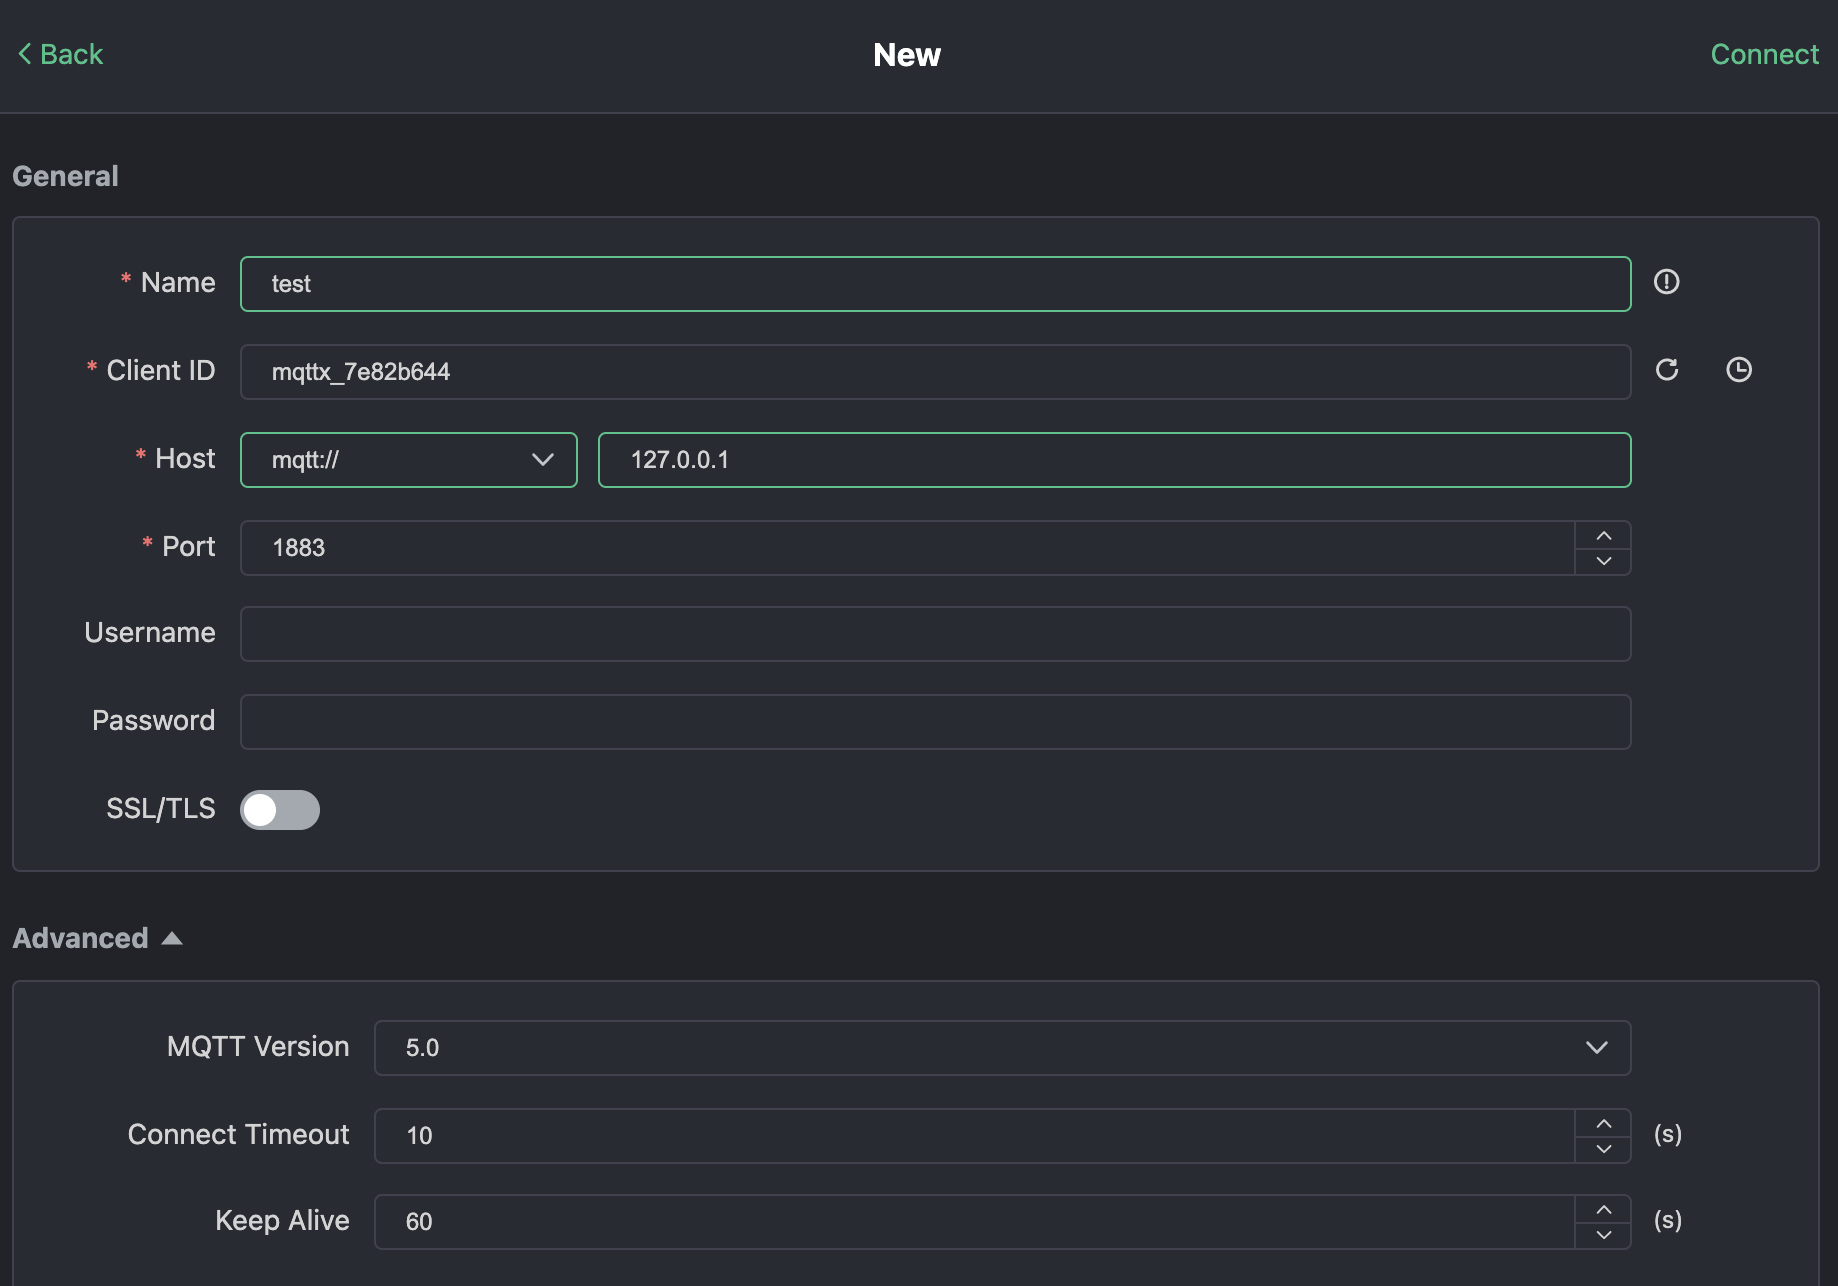
- Open MQTTX and click on “New Connection” or the “+” sign on the left sidebar to create a new connection configuration.
-
Fill in the required fields:
- Name: Name of this configuration. You can choose any name.
- ClientID: Client ID, which you can set manually or generate randomly using the button on the right. It must contain characters “a-z”, “0-9”, “_”, “-”, and cannot exceed 128 bytes. It should be in UTF8 encoding and must be unique.
- Host: Connection address. Start with the protocol prefix (mqtt:// for TCP, mqtts:// for TLS/SSL, or wss:// for WSS) followed by the domain name that accesses the BifroMQ server.
- Port: Connection port. Choose the appropriate port based on the protocol prefix. Default ports are TCP: 1883, TLS/SSL: 1884, WSS: 443.
- Username & Password: Enter the username and password you possess, or leave them blank if your BifroMQ installation is for testing only.
- MQTT Version: Select 3.1, 3.1.1, 5.0
-
After correctly entering the connection configuration, click 'Connect' in the top right corner to connect to the server.
-
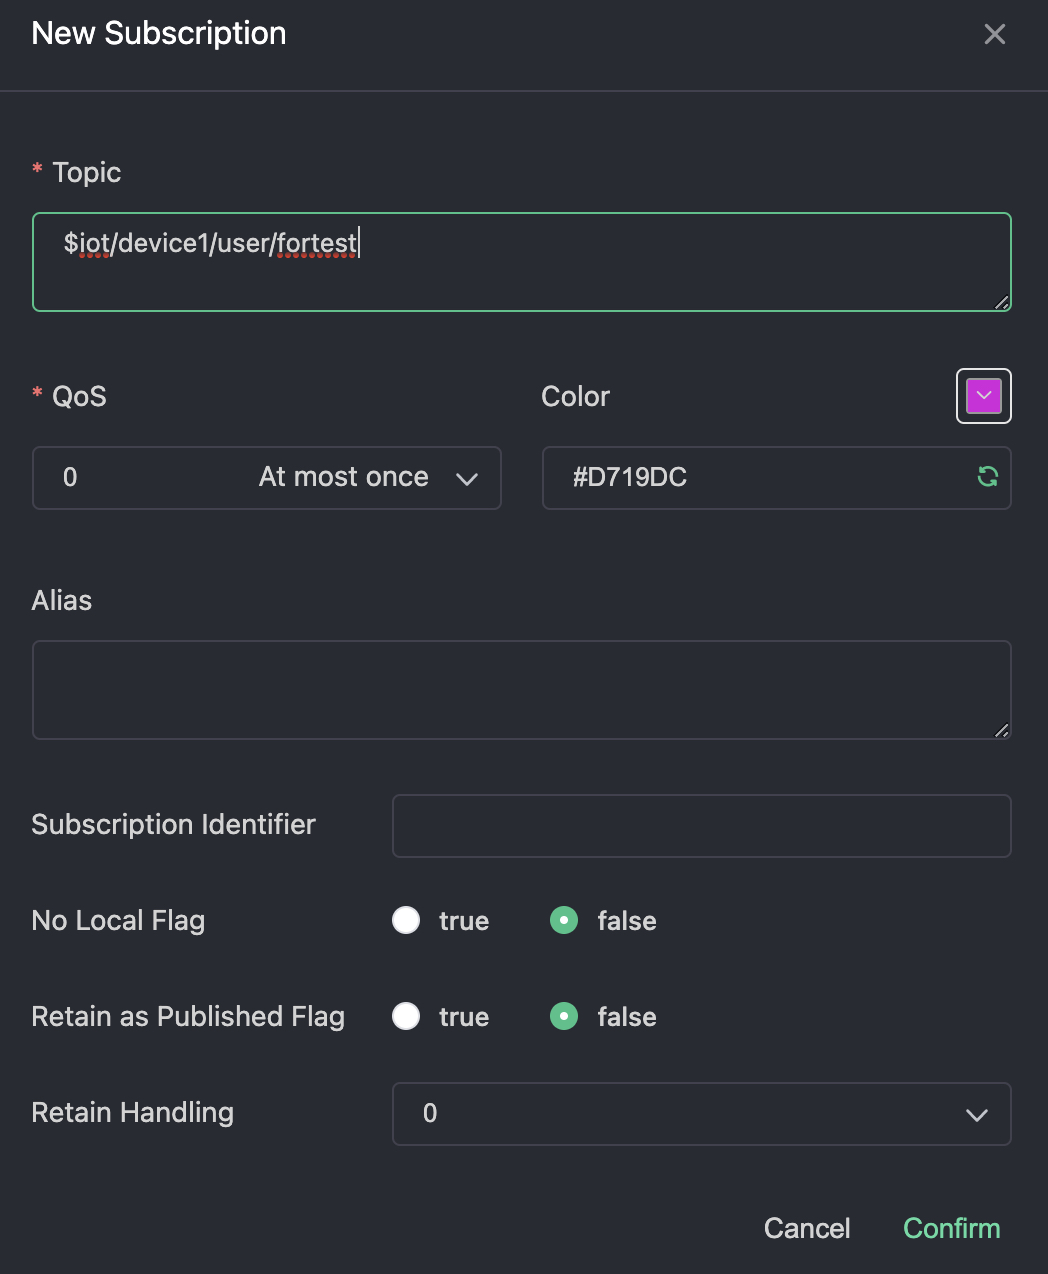
Subscribe to a topic: Click on the “New Subscription” button in the top left corner and enter the topic in the pop-up dialog box.
- Publish a message: In the message send/receive interface, enter the same topic you subscribed to in the bottom right corner. Choose the default QoS 0, type your message content, and click the send button to publish.
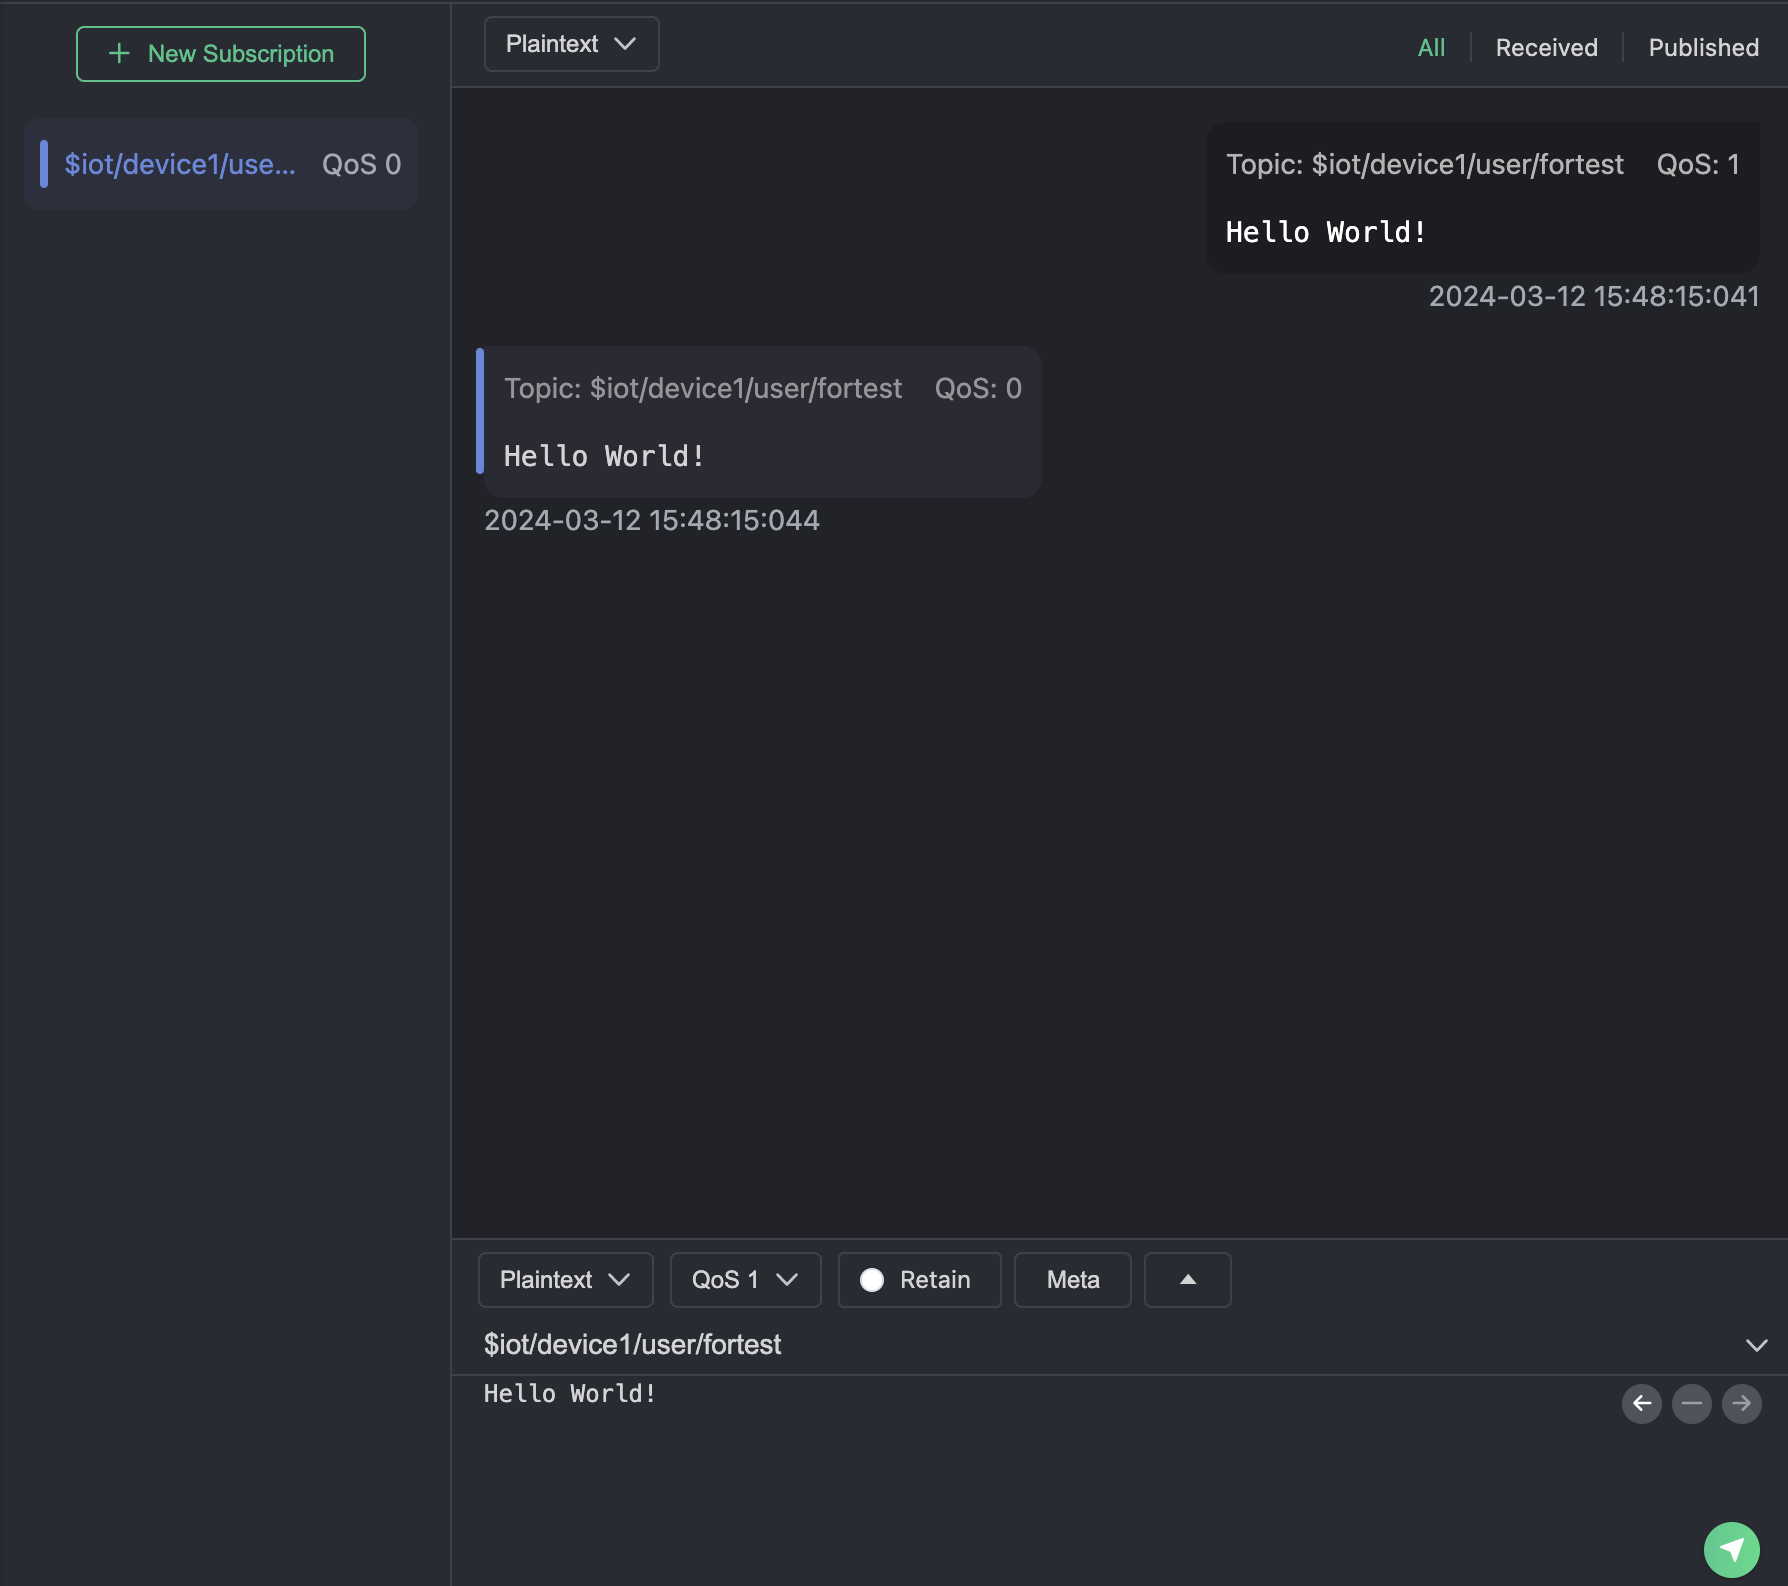
- Once the message is successfully sent, you should see the sent message appear on the right side of the interface.