Connect to BifroMQ
Simple Connection Verification using an MQTT Client
Using an existing third-party MQTT client tool, you can quickly verify whether you can send or receive messages by interacting with the MQTT service provided by BifroMQ.
There are several free third-party MQTT client tools available such as MQTT.fx, MQTTBox, MQTTLens, MQTTX, etc. In this example, we will be using MQTTX.
- Visit https://mqttx.app/ to download MQTTX and install it.
- Open MQTTX and click on “New Connection” or the “+” sign on the left sidebar to create a new connection configuration.

-
Fill in the required fields:
- Name: Name of this configuration. You can choose any name.
- ClientID: Client ID, which you can set manually or generate randomly using the button on the right. It must contain characters “a-z”, “0-9”, “_”, “-”, and cannot exceed 128 bytes. It should be in UTF8 encoding and must be unique.
- Host: Connection address. Choose the protocol prefix from mqtt://, mqtts://, or wss://, corresponding to TCP, TLS/SSL, or WSS in MQTT connection respectively. Please fill in the domain name that can actually access the BifroMQ MQTT service.
- Port: Connection port. Choose the appropriate port based on the protocol prefix. Default ports are TCP: 1883, TLS/SSL: 1884, WSS: 443.
- Username & Password: Enter the username and password you possess.
- MQTT Version: Select 3.1.1
-
After entering the connection configuration correctly, click "Connect" in the top right corner to connect to the server. If everything is fine, you will see a "Connect Successful" message and be redirected to the message send/receive interface.
-
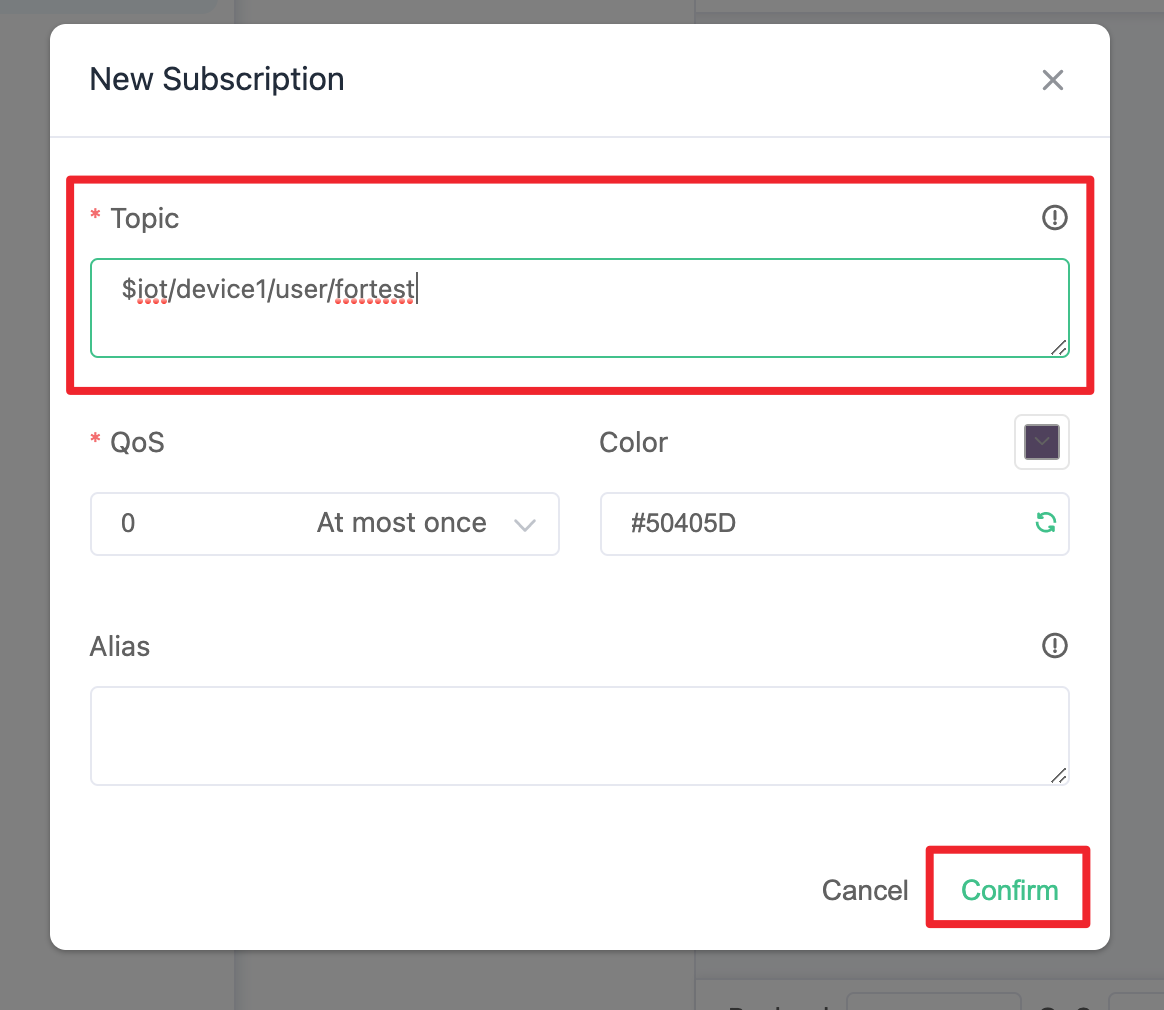
Subscribe to a topic: Click on the “New Subscription” button in the top left corner and enter the topic in the pop-up dialog box. Note that you must enter a topic you have subscription privileges for. In this example, we will use a test topic: $iot/device1/user/fortest. Select the default QoS 0 and click "Confirm" to subscribe.
- Publish a message: In the message send/receive interface, enter the topic in the bottom right corner. We will use the same test topic as before. Send a message to yourself by selecting the default QoS 0, entering the message content, and clicking the send button.
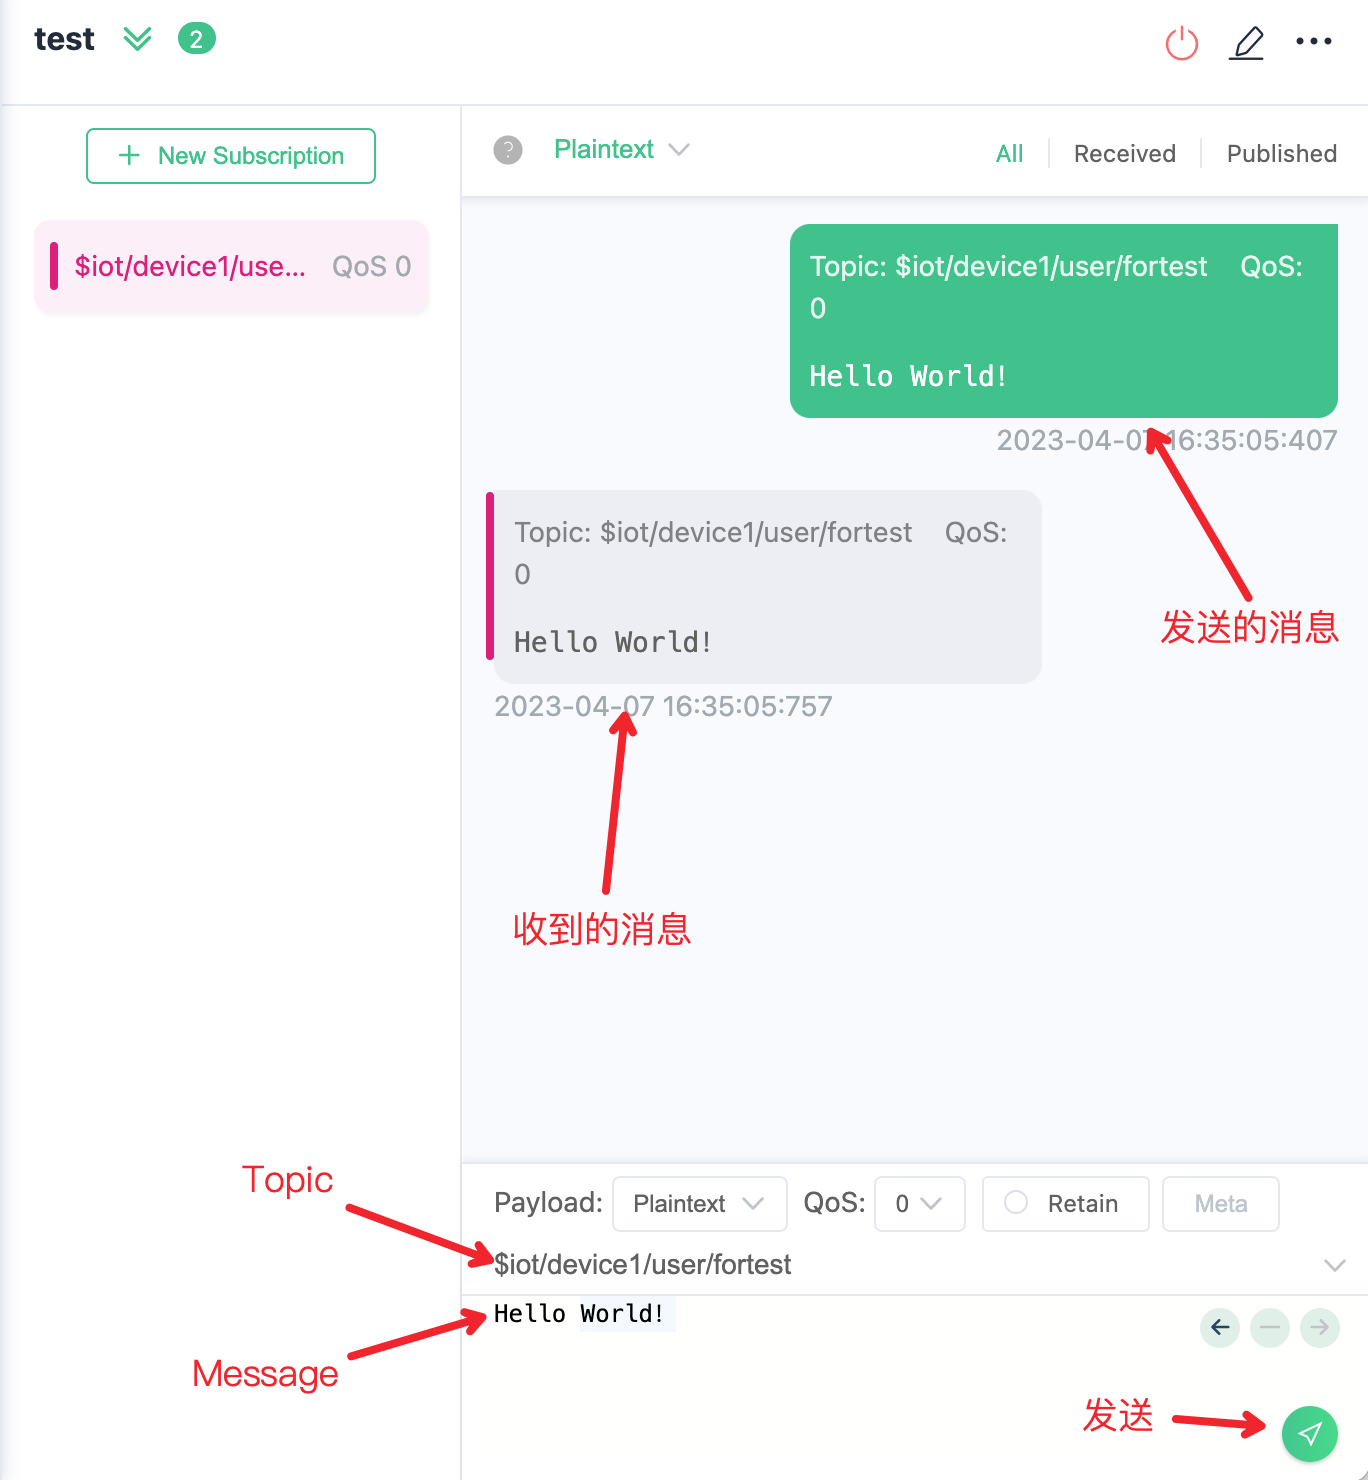
- After sending the message successfully, you can see the sent message on the right. If the MQTT service is working properly, since we are subscribed to that topic, we will receive the message and it will also be displayed on the left side of the conversation interface.